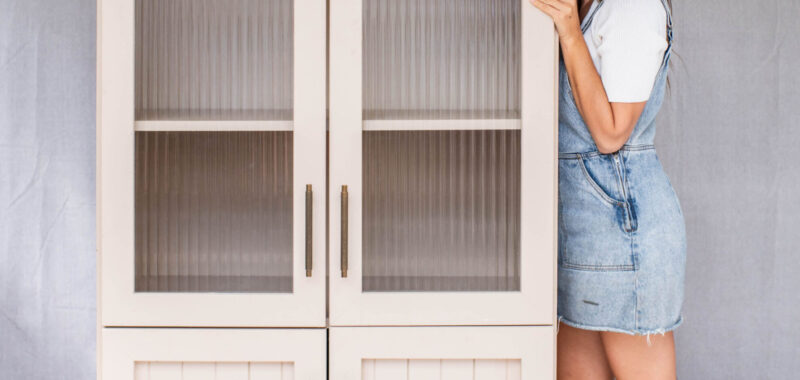
How To Upcycle An Old Display Cabinet
Interiors


Without a doubt, this has to be one of my favourite transformations!
Even though it was more work than most of the projects you’ll find in my furniture upcycling course, it really shines now.
The entire DIY can be summed up in three steps. First, I removed the old moulding and added on the new, modern moulding. I then cleaned and painted it and finally added gorgeous reeded glass. Find the step by steps below!
Cost: $270
Time to complete: 10 hours
Tolls + Materials
Microfiber cloth
Paint tray
Paint (I used Dulux Puddle)
Primer (I used Zinsser BIN Shellac Based Primer White)
Clear sealant (I used Dulux Clear Top Coat)
Nails
Hammer and mallet
Wood filler
Wood glue
Scraper
Paint brush
Foam roller
Drop cloth
180 grit sanding sheets
Timber lengths
Caulking gun
Adhesive Sealant (I used Sikaflex Crystal Clear Adhesive Sealant)
Electric sander (I used Bosch Random Orbital Sander)
Drill (I used Bosch Universal Drill)
Reeded glass (mine was cut to size by a glazier)


1. Place the cabinet on a drop cloth in a well-ventilated area outside or a large shed.
2. Brush all of the dust and/or dirt from the piece and remove shelving.
3. Wipe the whole cabinet with a rag or microfiber cloth to ensure it is well-cleaned.
4. Remove any unwanted features — like the moulding — from the cabinet using a mallet. Then remove handles or knobs using a drill or screwdriver.


5. Create new moulding for the top by mitreing the ends of 3 pieces of 50mm timber and 3 pieces of 100mm timber for the bottom.
6. Add wood glue onto the back of the timber moulding. Then, place the moulding onto the cabinet in the correct location, ensuring the mitre cuts meet up.
7. Use a hammer and nails to secure the moulding to the cabinet.
8. Fill in the nail holes and corner joins with a scraper and wood filler.


9. Remove the doors at the hinges by using a screwdriver or drill.
10. Sand the cabinet with an electric sander and 180-grit sandpaper. Move the sander back and forth lightly across the surface. Wipe down the surface with a microfiber cloth.
11. Use wood filler to fill in any holes left over from hardware if you are going to change the location of the handles/knobs and lightly sand all of the filler once dry.
12. Use painter’s tape to cover any areas you do not want to get paint on then apply primer to the whole surface using a cutting-in brush for the corners and more detailed areas, and a roller on flat areas.


13. Allow the primer to dry and then give it a scuff sand using a sanding sponge.
14. Now paint the piece in your chosen colour. Start with a flat cutting-in brush on any areas a roller can’t reach, such as corners or edges.
15. Paint over the rest of the piece with a high-density foam roller. Ensure your roller is fully loaded with an even amount of paint and roll gently back and forth.
16. Paint the doors and shelves using the same technique. Allow the paint to dry and repeat the steps for a second and possibly third coat if needed. Once you are happy with the colour and it is dry, apply a clear sealant coat to seal the paint.


17. Using a caulking gun, place a line of adhesive sealant into the groove around the door frame.
18. Gently place the cut piece of glass into the door frame where you’ve just placed the sealant.
19. Using a hammer and nails, attach a small piece of wood, slightly wider than the width of the glass, over the top and bottom of the glass.
20. Add new handles and knobs onto the piece using the previous location or create a new location with a pilot hole.


21. Reattach the doors at the old hinge points using a screwdriver.
22. Place the shelves back inside the cabinet, and voila! You’re done!
This upcycling project was an extract from Geneva Vanderzeil’s DIY School. Sign up for her online courses here.

